A few weeks back I was
lucky enough to meet a fellow
Ravelry member who goes by
the username
Miahandcrafter.
The more we spoke the more
I realized
how kind and talented she
is.
Out of this meeting came a variation of my Hobbes pattern
which was co-created by myself and Mia
which we'd like to share with you.

So you now you have 2 patterns to choose from.
Our new version posted below
and my Original Hobbes pattern here
But before we get to our pattern
Out of this meeting came a variation of my Hobbes pattern
which was co-created by myself and Mia
which we'd like to share with you.

So you now you have 2 patterns to choose from.
Our new version posted below
and my Original Hobbes pattern here
But before we get to our pattern
here is a bit about Mia:
When did you first start crocheting?
''I think I started
crocheting in January of 2010.
I went to my grandma’s
house to have some crochet lessons with her.
So, she helped me out with
my first project,
which was an awesome Kero pattern
created by Ournew from
Craftster.''
Why did you
choose to make amigurumi?
''Well, I’ve always been a
lover of plushes.
Being more realistic, I’m
an addicted to plushies, lol.
My room is full of them in
any size you can imagine.
So, when I discovered that
I could do my own plushies with crochet, I went crazy!
That’s when
I decided to learn crochet and make every plush I desire.''
Who
inspired and supported you?
''The person who inspired me to crochet is my Grandma,
because she does lovely works, which I’ve always been
a fan.
It was also her, my boyfriend and my parents
who gave me support to start learning crochet."
Why did
you decide to start your blog?
''I decided to create a blog in order to share my amigurumi patterns
and
help other crocheters with some tutorials.
The urge to create my blog
came from my admiration
of all crocheters who share their patterns for
free,
especially WolfDreamer.
I think there’s nothing better than
to find
the desired pattern for free!''
~~~~~~~~~~~~~~~~~~~~~~~~~~~~~~~~~~~~~~~~
Gengar, R2D2, Charizard, Majin Buu, Princess Lumpy Space
and my personal favourite Jake the Dog!!!!


You can also find her
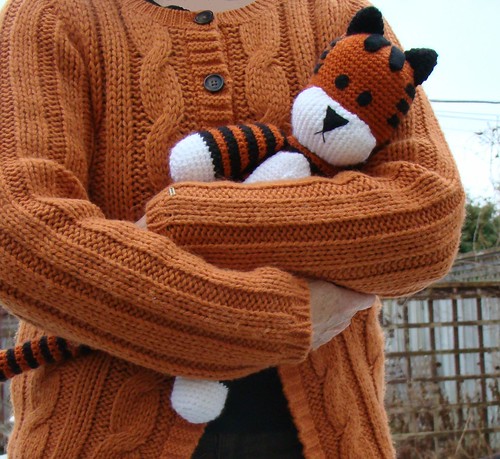
So without further delay here is our pattern.Hobbes Crochet Pattern
by sukigirl and miahandcrafter
Materials:
- Black, Orange, Red and White yarn;
- Black Felt;
- Fiberfill;
- Tapestry Needle;
- Contact Glue or Fabric Glue.
Notes:
1. This pattern uses 100% acrylic yarn. Thickness is 3/6 Nm (Don’t know “Nm”? Click here).
(Yarn used was Le Mont by Circulo.....you can substitute a DK weight)
2. Hobbes measures 21 inches (53cm) from ears to feet.
3. In this pattern it is necessary to join the rounds, because of Haroldo’s stripes (black tiger stripes)! If you don’t do that, the stripes will be irregular and won’t look good, so, I recommend you to join the rounds! (If you don’t know how to join rounds, watch this video)
4. For sewing the pieces together you will use the tapestry needle.
5. His eyes, nose, mouth and head stripes will be made of felt.
Any doubts feel free to leave a comment on our blogs. You may also e-mail us.
Pattern:
- Body
Start using the orange yarn.
Round 1: 6 Sc in MR. (6)
Round 2: 2 Sc in each Sc (12)
Round 3: sc, 2 Sc in next Sc (18)
Now, before starting the round 4, change to the black yarn.
Round 4: sc 2, 2 sc in next sc (24)
Round 5: sc 3, 2 sc in next sc (30)
Round 6: sc 4, 2 sc in next sc (36)
Now, before starting the round 7, change to the orange yarn.
Round 7: sc 5, 2 sc in next sc (42)
Round 8: sc 6, 2 sc in next sc (48)
Round 9: sc 7, 2 sc in next sc (54)
Now, before starting the round 10, change to the black yarn.
Round 10: sc 8, 2 sc in next sc (60)
Round 11-12: sc in each sc (60)
Now, before starting the round 13, change to the orange yarn.
Round 13-15: Sc in each Sc (60)
Now, before starting the round 16, change to the black yarn.
Round 16-18: Sc in each Sc (60)
Now, before starting the round 19, change to the orange yarn.
Round 19-21: Sc in each Sc (60)
Now, before starting the round 22, change to the black yarn.
Round 22-24: Sc in each Sc (60)
Now, before starting the round 25, change to the orange yarn.
Round 25-27: Sc in each Sc (60)
Now, before starting the round 28, change to the black yarn.
Round 28-30: Sc in each Sc (60)
Now, before starting the round 31, change to the orange yarn.
Round 31-33: Sc in each Sc (60)
Now, before starting the round 34, change to the black yarn.
Round 34-36: Sc in each Sc (60)
Now, before starting the round 37, change to the orange yarn.
Round 37-39: Sc in each Sc (60)
Now, before starting the round 40, change to the black yarn.
Round 40-42: Sc in each Sc (60)
Now, before starting the round 43, change to the orange yarn.
Round 43: Sc 8, dec (54)
Round 44-45: sc in each sc (54)
Now, before starting the round 46, change to the black yarn.
Round 46: Sc 7, dec (48)
Round 47-48: sc in each sc (48)
Now, before starting the round 49, change to the orange yarn.
Round 49: Sc 6, dec (42)
Round 50: sc in each sc (42)
Round 51: sc 5, dec (36)
Now, before starting the round 52, change to the black yarn.
Round 52: sc in each sc (36)
Round 53: sc 4, dec (30)
Finish off.
- Head
Make it using just the orange yarn. (Then, we will do the head stripes with black felt)
Round 1: 6 Sc in MR. (6)
Round 2: 2 Sc in each Sc (12)
Round 3: sc, 2 Sc in next Sc (18)
Round 4: sc 2, 2 sc in next sc (24)
Round 5: sc 3, 2 sc in next sc (30)
Round 6: sc 4, 2 sc in next sc (36)
Round 7: sc 5, 2 sc in next sc (42)
Round 8: sc 6, 2 sc in next sc (48)
Round 9: sc 7, 2 sc in next sc (54)
Round 10-12: sc in each sc (54)
Round 13: sc 8, 2 sc in next sc (60)
Round 14-31: sc on each sc (60)
Round 32: sc 8, dec (54)
Round 33: sc 7, dec (48)
Round 34: sc 6, dec (42)
Round 35: sc 5, dec (36)
Round 36: sc 4, dec (30)
Finish off and leave a long tail to sew the head to the body.
- Muzzle
Make it using white yarn.
Row 1: ch 17, then sc 16 from the second ch from hook (16)
Row 2: inc, sc 14, inc (18)
Row 3:inc, sc 16, inc (20)
Row 4: inc, sc 18, inc (22)
Row 5: inc, sc 20, inc (24)
Row 6: sc in each sc (24)
Row 7: sc in each sc (24)
Row 8: sc in each sc (24)
Row 9: dec, sc 20, dec (22)
Row 10: dec, sc 18, dec (20)
Row 11: dec, sc 16, dec (18)
Row 12: dec, sc 14, dec (16)
Now, crochet sc’s around the muzzle to give it an edge and then finish off, leaving a long tail to sew it to the head.
- Ears
Make it using black yarn.
Round 1: 6 sc into MR (6 sts)
Round 2: 2 sc in each sc (12)
Round 3: Sc in each Sc (12)
Round 4: sc, 2 sc in next sc (18)
Round 5: sc in each sc (18)
Round 6: sc 2, 2 sc in next sc (24)
Round 7-9: sc in each sc (24)
Finish off and leave a long tail to sew it to the head.
- Legs
Start using the White yarn.
Round 1: 6 Sc in MR (6)
Round 2: 2 Sc in each Sc (12)
Round 3: Sc, 2 Sc in next (18)
Round 4: Sc 2, 2 Sc in next (24)
Round 5: Sc 3, 2 Sc in next (30)
Round 6-9: Sc in each Sc (30)
Now, before starting the round 10, change to the black yarn.
Round 10-12: Sc in each Sc (30)
Now, before starting the round 13, change to the orange yarn.
Round 13-15: Sc in each Sc (30)
Now, before starting the round 16, change to the black yarn.
Round 16-18: Sc in each Sc (30)
Now, before starting the round 19, change to the orange yarn.
Round 19-21: Sc in each Sc (30)
Now, before starting the round 22, change to the black yarn.
Round 22-24: Sc in each Sc (30)
Now, before starting the round 25, change to the orange yarn.
Round 25-27: Sc in each Sc (30)
- Arms
Start using White yarn.
Round 1: 6 Sc in MR (6)
Round 2: 2 Sc in each Sc (12)
Round 3: Sc, 2 Sc in next (18)
Round 4: Sc 2, 2 Sc in next (24)
Round 5: Sc 11, inc (26)
Round 6-9: sc in each sc (26)
Now, before starting the round 10, change to the black yarn.
Round 10-12: sc in each sc (26)
Now, before starting the round 13, change to the orange yarn.
Round 13-15: sc in each sc (26)
Now, before starting the round 16, change to the black yarn.
Round 16-18: sc in each sc (26)
Now, before starting start the round 19, change to the orange yarn.
Round 19-21: sc in each sc (26)
Now, before starting the round 22, change to the black yarn.
Round 22-24: sc in each sc (26)
Now, before starting the round 25, change to the orange yarn.
Round 25-27: sc in each sc (26)
Now, we will work in rows, before we start we should change our yarn to the black one.
Row 28: 13 sc (13)
Row 29: 11 sc (11)
Row 30: 9 sc (9)
Finish off and leave a long tail to sew the arm to the body.
- Underbelly
Make it using white yarn.
Chain 9
Row 1: sc 8 (8)
Row 2: inc , sc 6, inc (10)
Row 3: inc, sc 8, inc (12)
Row 4: inc, sc 10, inc (14)
Row 5: inc, sc 12, inc (16)
Row 6: inc, sc 14, inc (18)
Row 7-35: sc in each sc (18)
Row 36: dec, sc 14, dec (16)
Row 37-47: sc in each sc (16)
Now, crochet sc’s around the underbelly to give it an edge and then finish off, leaving a long tail to sew it to the body.
- Tail
Start the tail using black yarn.
Round 1: 6 Sc in MR (6)
Round 2: 2 Sc in each Sc (12)
Round 3-7: sc in each sc (12)
Now, before starting the round 8, change to the orange yarn.
Round 8-10: sc in each sc (12)
Now, before starting the round 11, change to the black yarn.
Round 11-13: sc in each sc (12)
Now, before starting the round 14, change to the orange yarn.
Round 14-16: sc in each sc (12)
Now, before starting the round 17, change to the black yarn.
Round 17-19: sc in each sc (12)
Now, before starting the round 20, change to the orange yarn.
Round 20-22: sc in each sc (12)
Now, before starting the round 23, change to the black yarn.
Round 23-25: sc in each sc (12)
Now, before starting the round 26, change to the orange yarn.
Round 26-28: sc in each sc (12)
Now, before starting the round 29, change to the black yarn.
Round 29-31: sc in each sc (12)
Now, before starting the round 31, change to the orange yarn.
Round 31-33: sc in each sc (12)
Now, before starting the round 34, change to the black yarn.
Round 34-36: sc in each sc (12)
Now, before starting the round 37, change to the orange yarn.
Round 37-39: sc in each sc (12)
Now, before starting the round 40, change to the black yarn.
Round 40-42: sc in each sc (12)
- Scarf
Make it using red yarn.
Row 1: ch 9, then sc 8 from the second ch from hook (8)
Row 2-125: sc in each sc (8)
Finish off. At the end my scarf was measuring about 69cm.
Now, let’s do the scarf details. It is simple, you just have to cut some pieces of yarn and then tie these pieces on the two tips of the scarf.
Assembly:
First, stuff the head, body, arms, legs and tail. Then you should sew the muzzle and ears to the head (if you want, you can put some fiber between the muzzle and the head). Then, you should sew the underbelly to the body. After this, sew the head, legs and tail to the body.
Finally, sew his arms to his body. To do this, you will place his arms with the Rows up. They should be placed up in order to make his arms be closest to his body. If you do not do that, the arms will make 90 degrees with the body. Take a look in the photo bellow:
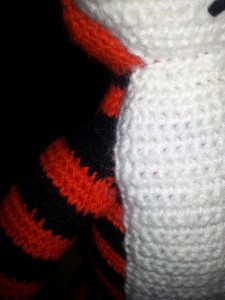
The black rows are placed up.
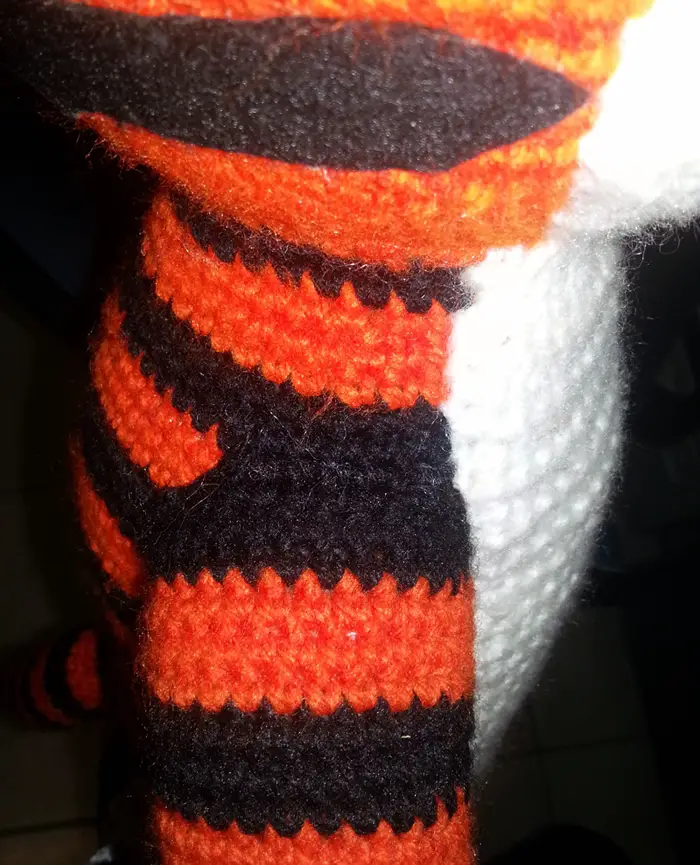
The black rows are placed up.
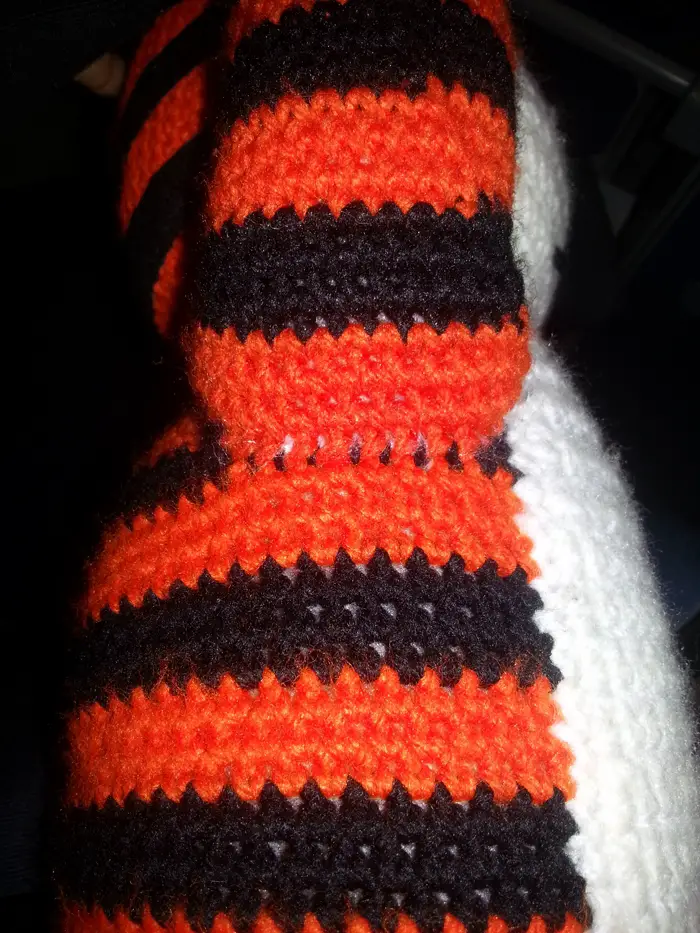
As you can see, in the bottom are placed the last Rounds.
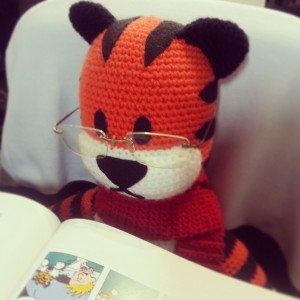
Finally, make the eyes, nose and mouth froom black felt. Cut the pieces and glue them to the face. (Use the pictures as reference)
That’s it! Now you may hug your Hobbes plush a lot!!
We did not create this character, Hobbes is copyright of Bill Watterson!!
This Pattern was created by Ann Stiver-Balla and Ana Amélia Mendes Galvão. Please do not claim our pattern as yours; If you use this pattern, give us the credits; If you wish to share this pattern, you may create a link to our blogs, but please do not post it on your site; You may not sell this pattern; As well, respect Bill Watterson copyright and do not sell any items made from this pattern.


