Monday, November 8, 2010

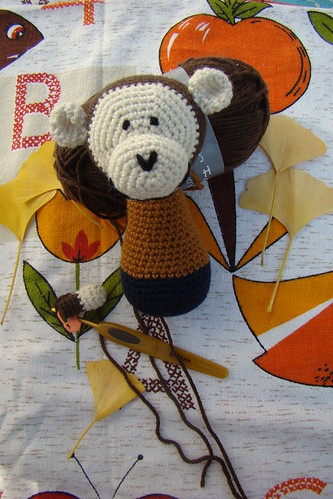
A crochet monkey, a vintage curtain and ginko leaves

Crochet monkey wip
Even though monkey is only partly finished
I thought he would enjoy going outside to
enjoy a beautiful autumn day.
Although monkey and I have spent only
a little time together, he and I have bonded.
Maybe it's because we have similar tastes..
obviously he likes vintage fabrics and
we are both fascinated by ginko trees.

But he is more impatient than I am.
I'm enjoying watching how his shape unfolds
as I make changes here and there.
But he is constantly rushing me to finish,
not concerned whether his legs curve
slightly inward, 
or if his shirt should be striped or plain.
But I forgive his restlessness,
for he is young.

Friday, November 5, 2010

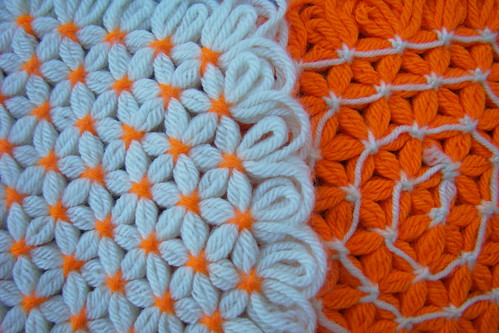
Help!......anyone know how to make these lovely thrift store coasters?

Look at those lovely flowers all held together
with what looks like simple knots.
But how are they done and what is the technique called?
I'd love to know!

thrift coasters

I flipped the orange one over so that you could see how it is tied together.

Sunday, October 31, 2010

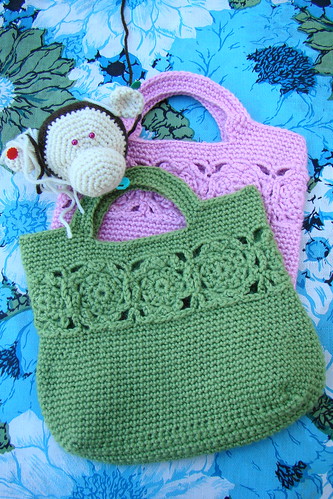
2 small crochet bags and a monkey head

Christmas presents

I've finished the green bag and 
again I have to say how much I love this pattern.
The designer is Yasmin Gamal and
her site is called "The C side of me".
She also has some lovely bag patterns for sale
at really reasonable prices.
The poor little monkey who has no body yet
will be a present for my new nephew
who was born in June.
I had a hard time deciding on what to make him
and then I remembered this monkey pattern.
I'm making him smaller than the original
and I'll probably change the shape of his body a fair bit.

Tuesday, October 12, 2010

Monday, October 11, 2010

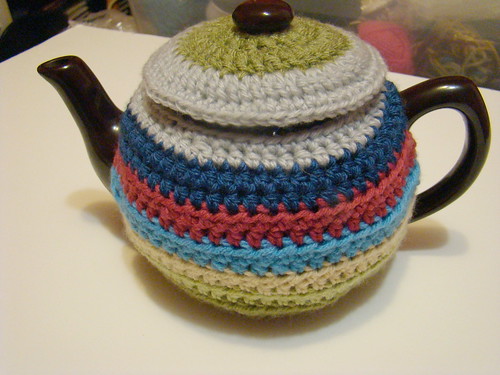
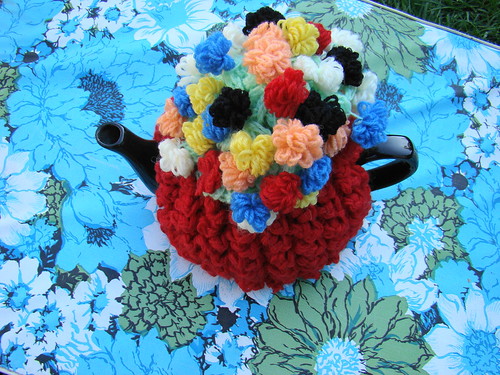
Instructions for making a scrappy teacosy


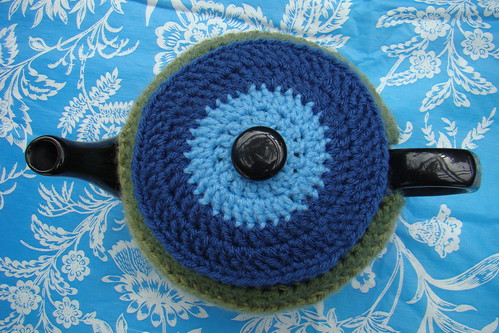
 Day 24: scrap happy teacosy

teacosy top view

 Please note that I am going to totally
revamp this pattern.
 When I first made this teacosy I didn't keep
notes as I really didn't expect that anyone 
would want to make it.
So I made a second cosy and wrote up general instructions.
Now that I look at it 4 years later I realize that it would
work better to start at the top and also
to give line by line detailed instructions.
 
With that said 
if you haven't started it yet you might want to 
wait for the newer version.
I will put the link to the newer version here
and eventually close this post down.
Thanks for understanding.

added....July 2012

Back in February I made the top cosy and was asked 
if I could post the pattern (my apologizes for taking so long).
I made a second one for a larger pot (above)
and diligently wrote down each row and each stitch count.
But because there are so many different shapes 
and sizes of teapots
I thought it would be much more helpful if
I explained the steps involved
instead of giving you a list of numbers.
That way you can make a cosy that fits
your pot instead of mine.
 
 This cosy is made, starting at the bottom.
It's important to keep trying your cosy on
your pot as you work on it 
so that you can make the necessary increases/decreases.
I flipped my teapot upside down on my lap
while I worked to make things easier for me. 

At first, as you work the first few rows
the cosy will not want to stay on the pot.
I found that it helped to temporarily tie the opening 
(under the handle) closed with some yarn.
As you get further into the cosy
it will stay on easier. 
I untied it when I got nearer to the top 
of the spout.

When you are finished the cosy
you will go back and add a buttoned closure
to this opening
so that it hugs the bottom of the pot snuggly
but still allows the cosy to
be easily slipped on and off the pot.
(If you prefer you can add extra chains in section one
so that the closure can be worked at that stage.)


Teacosy:
I worked my cosy in hdc but feel free to
experiment with other stitches.
I worked 2 rows of each colour for the body
and I ended rows with 2 chains for turning.
I do not tell you where to add the increases/decreases,
trust me.... your pot will let you know.

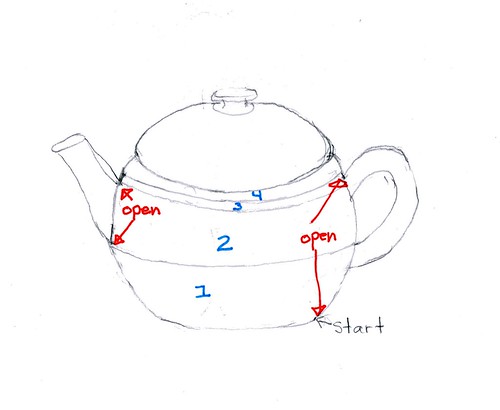
There are 4 sections to the body.
The size of each section will vary with different pots.
drawing for teacosy instructions


The cosy in the picture below is shown upside down so the hole you see at the top is actually the
bottom of the cosy.
This was the second cosy that I made. Note that in this picture I have used the second option
in the instructions where I have added a tab (it's temporarily pinned to form a closed circle.)
Photobucket

And here is a shot showing the opening for the spout.
The cosy is shown right side up.
Notice for this teapot that the opening for the spout starts really low.
Photobucket


Body:
1. Bottom section: This is worked in rows leaving an opening only for the handle.
The instructions don't include the tab under the handle, you can add that when the cosy
is finished. (Or you can add more chains and work the tab).
Make as many loose chains necessary to go from the the edge of the handle around the pot to the other edge of the handle. I found that my yarn stretched so I took that into consideration.
Add 2 more chains for turning.
Work rows of hdc turning at handle.
Your last row should just touch the bottom of the spout.

2. This section is worked leaving both the handle and the spout open.
You will now work 2 sides separately. 
Each side will be worked in rows between the handle and the spout.
Work on one side first...making as many rows necessary to reach the height of 
the top of the spout (on most teapots you will reach the top of the spout before the handle
....but not always).
When you are finished side one break yarn.
(If you finish on your first row of a colour then leave a longer tail (long enough to make a full row of hdc around the pot.
If you finished on your second of a colour then just leave the usual tail length. 
You'll see why in section 3).
Join new yarn to second side and finish that side to same height as first. Break off yarn as usual.

3. This section is worked with an opening only for the handle.
You probably only have to work a couple of rows for this section.
Join new yarn to the first stitch on side one (handle side)...or use dropped yarn.
Work across side one to the spout, then make enough chains to go across the top of the spout, then join to second side ( I made a slip stitch in first st, ch 2 then put my first hdc into sl st)
Continue crocheting across second side turning at handle.
Continue working rows back and forth until you reach the height of the top of the handle.

4.This section is worked in rounds not rows.
Crochet across until you reach the handle top, make enough chains to go across the handle
then continue working in rounds
You should be making quite a few decreases in this part...
to give you an idea; I went from 68 st to 55 st over 5 rows.
I ended just under the ridge of the top opening. You might have to end with sc for the last row
if necessary.

Lid: 
This is basically a circle with a hole in the centre for the knob
I worked the entire lid in dc.
I chained 16 joining with sl st.
Remember that you are making a dome so you really are just making less increases
to the normal pattern of a flat circle.

Finishing up.
If you haven't added a tab for under the handle you should add it now.
I just attached the yarn to the bottom edge and chained enough stitches
so that I could form a small tab below the handle.
I made a space for the button by making a few slip stitches.

I also crocheted a row of slip stitches along the edges of the openings for the spout and handle
just to clean up the edges.
I used the loose tails of the rows instead of using a new piece of yarn so that it wasn't
edged in a single colour.

Please let me know if something confuses you
and I'll try to clarify it.

As usual I ask that you do not reproduce this pattern
or claim it as your own.
Please feel free to link to my page.


Tuesday, September 28, 2010

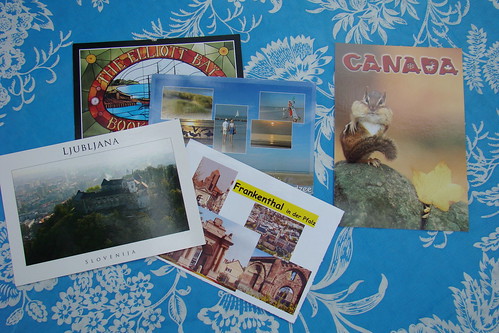
postcards from around the world


I was tired of only seeing bills in my mailbox
so a little while ago I signed up to a cool site called
Postcrossing.
Here's how it works.
You are given the name and address of
someone from around the world and 
you then send them
a postcard.
Once they receive it your name and address is sent
to a totally different person who will send
you a card from their corner of the world.


It's a wonderful surprise to receive them.
I've gotten 4 so far...
from Germany, Slovenia, Belgium and Seattle.
All have written a little about themselves
and their area.


I have sent cards to Kenya, Taiwan, China,
The Netherlands and Wyoming.
The chipmunk card on the right is going 
to a little 3 year old from Germany.
I hope she likes it.


Monday, September 27, 2010

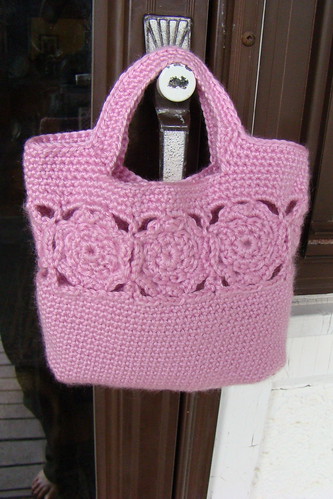
Flower burst bag

little pink purse
First Christmas present done.
(Not the best picture as it is raining here).
I really like how this turned out.
It's the perfect size for a little girl to hold
all her treasures in.
It's 6 inches tall by 7 inches wide.
I made this one with Bernat Satin and used this 
It only took 3/4 of a skein so it cost
 about $3 to make.

I've bought some green organic yarn
to make one for another niece
so I'm curious how different it will look
(other than one is pink and one is green :0)

Sunday, September 12, 2010

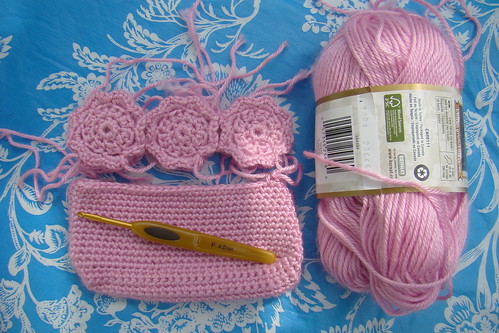
Wip: a little bag for a little girl

I'm starting on my Christmas presents earlier this year.
This way when I change my mind a million and
a half times it won't actually be late December 
by the time I finish it.
a small pink bag...wip

I started off with a very simple but pretty bag for 
my 2 1/2 year old niece.
She is a girly girl and I never know what she
will like. Also her mum really isn't a fan
of handmade things.
So I picked something that doesn't take a long
time to make.

So far I'm loving this bag!
The pattern is for an adult so I shrunk it down by
using a 4.5mm hook and crocheted really tightly 
(hard on the hands).
You make the flowers first, joining them as you go.
Then you make the bottom part and
attach it to the flowers.
Then all you have left is to make the top.
Easy peasy!

Wednesday, September 1, 2010

Tea lover's roundup

Most people know that although I love coffee,
I am a bit obsessed with tea.
So I was excited to learn that Ms. Muffin
over at the wonderful blog Muffins and More
is celebrating the month of September by 
featuring tea related posts...cool eh!

I'm looking forward to pouring myself a cuppa
each morning (sorry coffee) and
seeing what goodies Ms. Muffin discovers.
And it's not too late to submit a tea related
project of your own.
So pop on over
(click on her cute button in the sidebar)

And what would a post be without a picture.
A vintage tea cosy


Tuesday, August 31, 2010

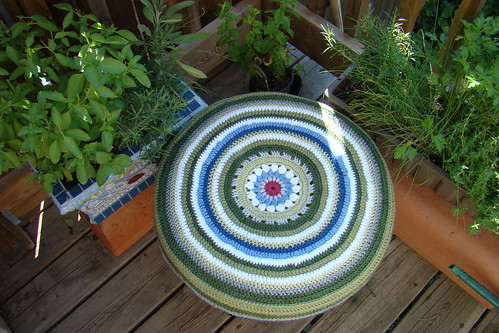
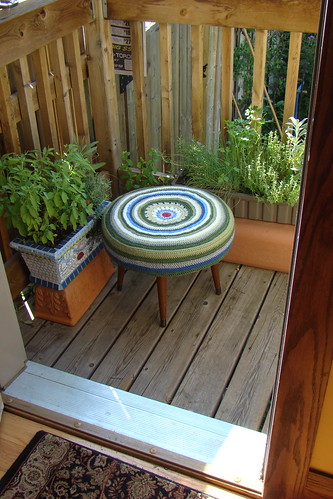
scrappy stool cover

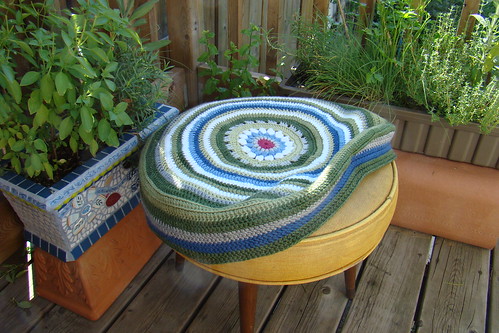
Top of stool cover made in crochet
I've been looking for a small stool that was just
the right size for my husband to put his feet on.
I found one on the curb that was
 a bit torn but was the perfect height.
 I originally planned to sew a cover for it
but I've been looking for ways to
use up my stash yarn so that is when
I decided to crochet this cover.

The centre part is the free pattern
called Sunburst granny by Priscilla Hewitt.
I continued working double crochet in rounds,
adjusting the fit as I went which was sometimes
difficult because my cat pounced on top of it
each time I tested to see if it fit.

I made 2 rows of each colour and when I reached
the edge I continued making double crochet but
with no increases.
I also worked the first row that went over the edge
into the back loops only so it would fold over nicely.

Here is a picture showing a peek at the stool
and also to show how it is removable so
that it can be washed.
crochet stool cover

Monday, August 2, 2010

stool wip


stool wip
Originally uploaded by sukigirl74
Playing around with colours...not sure if the last blue will
work but it will be easy enough to rip out if not.
More details when finished.

Friday, July 30, 2010

Crocheting using a knitting pattern

 I borrowed Susan Anderson's cute book
Itty-Bitty Nursery from the library
and fell in love with her cute
pacifier clips.
I knew that there was no way that I could knit
them but I wondered if I could crochet them
using the pattern as a guide.
I chose the elephant because it's cute but
also because it is made up of simple shapes.
This is how it turned out.

I started by substituting a single crochet 
for the knit stitches.
This worked well and even the gauge
came out the same.
Then I tried a couple of ways to handle the
increases/decreases, none worked.
Each resulted in incorrect stitch counts.

So what I did instead was
I looked at the stitch count at the end of each row.
and made the number of increases/decreases
necessary to get the right number of stitches.
I then spread out the increases and decreases 
as evenly as possible in each row. 


Obviously if you are comfortable with 
knitting a small toy on DPNs then that's
the way to go.
But I'm not so I'm glad that,
at least as far as this pattern is concerned,
I was able to produce a decent crocheted clone!

Wednesday, July 28, 2010

Getting back into crochet

I haven't crocheted since March for a few reasons.....
vacation, family get togethers, hot, humid weather, gardening, 
and I've gotten back into reading every day.
(I just finished The Girl who played with Fire).
Great book! 
I'm looking forward to reading the 3rd one which, 
unfortunately, is also the last.

So I decided to start small by making these booties.

 I changed them up a bit by slanting
the strap to the side.
I'm fairly happy with them although 
the pattern has a mistake in it
and it took quite a while to get the correction.


I hope Sebastian likes them.

Thursday, May 13, 2010

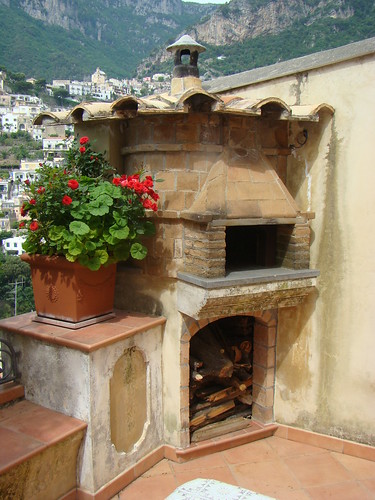
Cooking...... old school

We made the most delicious pizza on this 
lovely wooden oven.
It took us a little time to get
the temperature just right .
Once we nailed that down we were 
in pizza heaven!
Of course it also helped that we used some of 
the most delicious local ingredients.

Wood oven

Tuesday, March 30, 2010

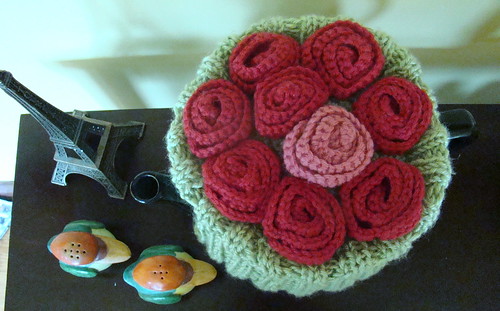
A spring teacosy called Rosey

Rosie Posy Tea Cosy
Spring-like weather has finally arrived
so it's only fitting that flowers
should adorn my newest teacosy.
Crocheted red roses sit on top of
a knitted grassy green body.

The next time friends visit I'll spread out
one of my vintage cloths,
pop some peppermint leaves into
Rosey and set out a few of my Gramma's 
lovely teacups and saucers.
And of course there will be 
some cranberry scones.


Tuesday, March 2, 2010

Good bye February


Positives from this month.
-I finally tried 2 new projects
(embroidery and stamp carving)
and I'm dying to do more.
-I set myself a challenge and completed it
even on those days 
that I didn't feel like it.
-I made some projects that have been
on my to-do list for a long time.
-I used up a LOT of scrap supplies.
-I came up with a couple patterns
plus loads of ideas.
-I've always seen my 'slowness' of
completing a craft as a negative.
I now realize that it gives me
time to change the pattern around if I want 
or to redo a part that I'm not happy with.

I'd like to do this again next
year but I would change a 
few things to make it a

little easier on myself.
The most important would be
to line up all the project ideas
(plus a few extras)
and their supplies
well ahead of time.
 This would help if the
unexpected happened...
like when my sewing machine
broke down or when
I underestimated how 
amazing the Olympics would be!


Also I would start one day early
so that I could take project 
pictures during the sunny hours 
so that at least some of the
colours would be true.


So I would highly recommend
this to anyone who's considering it.
Next year I'd like to sign up for
the official Thing-a-day.

And thanks to my cheering section!!!


Sunday, February 28, 2010

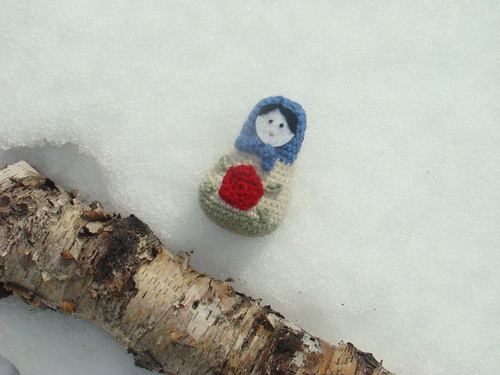
Last Day of the Month!!!! ...Matryoshka

Day 28: Matryoshka
I was going to add some pink
cheeks but I haven't got 
any felt in that colour.
And the felt that I do have tends
to pull apart when you 
try to sew with it,
since it's the cheap acrylic kind.

I think that I really need to 
order wool felt online 
or make my own. 
~~~~~~~~~~~~~~~~~~~~~~~~~~
Final tally
This project..no new supplies
Total month $21.38 and
the majority of that was on
two projects that were 
new to me 
(making stamps and embroidery).

Saturday, February 27, 2010

Day 27: owl

Today I'm off to see the Beatles,
  actually I'm seeing a cover band, 
a very good cover band called Rain.
So I picked this small knitted
owl as today's project.
It was very easy even for 
a non-knitter like me .
Day 27: a little owl

I didn't have any owly yarn
so I mixed plain beige
merino with some leftover
dark brown kid mohair.
Free pattern here

Friday, February 26, 2010

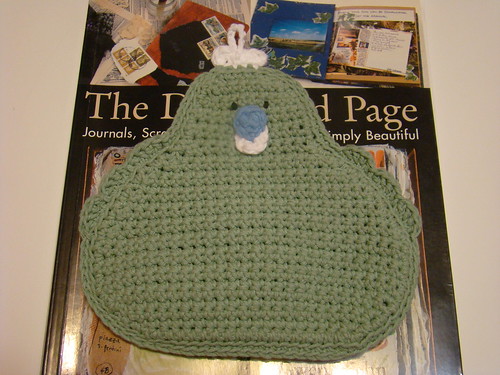
Day 26: green chicken potholder

Day 26:  chicken potholder
I was really hoping this would be a
quick project but then realized it had 2
sides to be crocheted plus I decided to
watch the Olympics
while I was making it.
I was going to make some
green eggs to go along with it.
Oh well. 

Crochet Max from the Wild Things

 Who doesn't love Max!! I'm really happy with this cute little guy Pattern by Carla Mitrani  You can find her on Ravelry  Max Patter...